SAML Authentication
SAML 2.0 configuration with AZURE AD
SAML Authentication will be configured where InstaSafe ISA shall serve as the Service Provider (SP) and Entra ID shall serve as the Identity Provider (IdP).
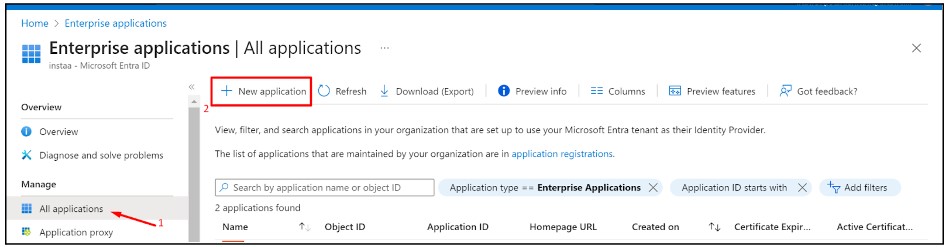
- Log in to portal.azure.com and select Microsoft Entra ID
- Click on ‘Enterprise applications’ in the dashboard panel on the left
- Click on ‘New application’
- Click on ‘Create your own application’
- Provide a custom name like instasafeisa and click ‘Create’

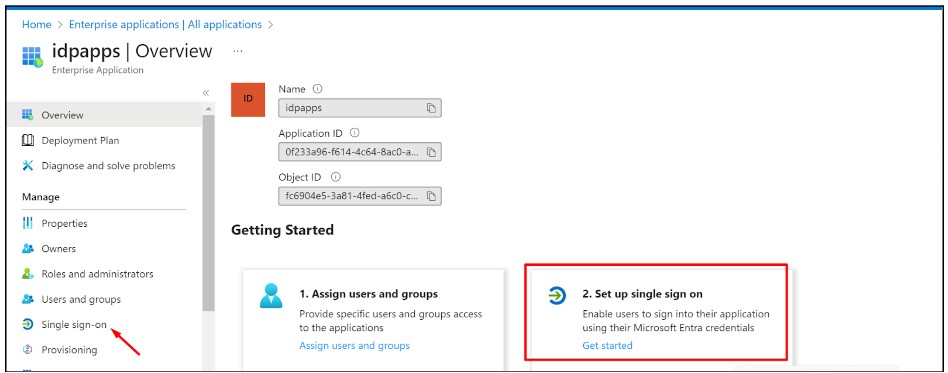
- Expand the newly created Application
- Click on ‘Single sign-on’ and then ‘Set up single sign-on’
- Fill up the details of your SP (InstaSafe ISA)
- Identifier (Entity ID): http://companyname.instasafe.com
- Reply URL (ACS URL): https://companyname.instasafe.com/api/saml/acs
- Logout URL: https://companyname.instasafe.com/api/saml/acs

- Download the Metadata from Entra ID (or copy all required values like Certificate, Entity ID, ACS URL, etc.) to be used later

- Login to the InstaSafe ISA Portal with Admin credentials
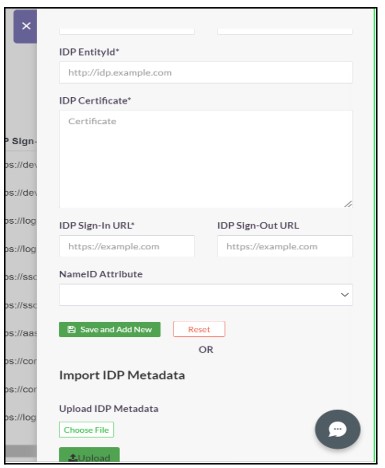
- Navigate to Authentication Profile >> SAML
- Click on ‘Add’

- The values from Entra ID (copied earlier) can be manually entered here, or automatically populated by uploading the IdP Metadata file (downloaded earlier)
- Click ‘Add’
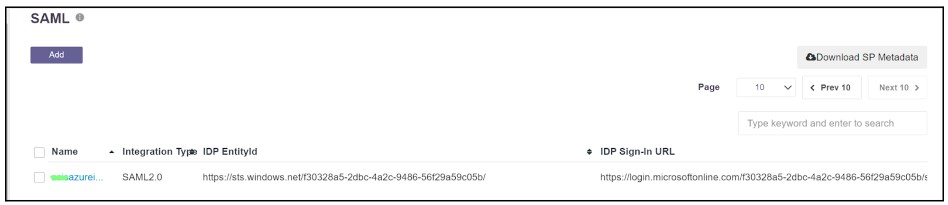
- Once created, the SAML profile will be available to view
-
The SAML Authentication profile can be assigned to the User Group synced from Entra ID
- Navigate to User Groups
- Locate and expand the User Group synced from Entra ID
- Click on ‘Edit’
- In the ‘Authentication Profile’ drop-down, select the SAML profile created
-
Click on ‘Update’
