Log into ZTAA via SSO
ZTAA as SP and Azure AD as IDP – SAML Configuration
Instasafe ZTAA can function as both an Identity Provider (IDP) and a Service Provider (SP). This article demonstrates how to configure ZTAA as a Service Provider and integrate it with Azure AD as an Identity Provider using SAML-based SSO.
What is SAML SSO?
SAML (Security Assertion Markup Language) is an XML-based standard for exchanging authentication data between an Identity Provider (IDP) and a Service Provider (SP). It allows for Single Sign-On (SSO), enabling users to access multiple applications with a single login.
- SSO simplifies access management by reducing the number of login prompts.
- ZTAA SSO supports integration with multi-factor authentication (MFA) for enhanced security.
Key Concepts
| Term | Definition |
|---|---|
| Identity Provider (IDP) | Authenticates users and provides assertions to the service provider. Azure AD is the IDP here. |
| Service Provider (SP) | Consumes SAML assertions to authenticate users. ZTAA acts as the SP in this configuration. |
| Assertion Consumer Service (ACS) | Receives and validates SAML assertions sent by the IDP. |
| Entity ID | Unique identifier for a SAML application. |
Logging into ZTAA via Azure SSO
| Setting | SP-Initiated | IDP-Initiated | Description |
|---|---|---|---|
| Entity ID | Required for some apps | Required for some apps | It uniquely identifies the ZTAA application. Azure AD sends it as the Audience in the SAML token, and ZTAA validates it. It also serves as the Entity ID. |
| ACS URL | Required | Required | Redirect URL where ZTAA receives SAML token from Azure. |
| Sign-on URL | Required | Optional | This URL is used by Azure AD to initiate sign-in when launching the app from Microsoft 365 or My Apps. If left blank, Azure AD performs an IdP-initiated sign-on from those sources. |
ZTAA as SP and Azure AD as IDP: Flow Summary
- User Access Request → User attempts to access ZTAA-protected resource.
- ZTAA Redirects → Redirects user to Azure AD login.
- User Authentication → User logs in via Azure AD.
- SAML Assertion Generation → Azure AD sends user identity details in SAML token.
- Assertion Validation → ZTAA validates the SAML token.
- Authorization → ZTAA grants access if user is authorized.
- Access Granted → User gains access to the application.
Steps to Configure
Azure AD Configuration
- Login to Azure Portal → https://portal.azure.com
- Go to Azure Active Directory > Enterprise Applications
- Click + New Application → Select Create your own application
-
Name the app (e.g.,
Instasafe ZTAA) and click Create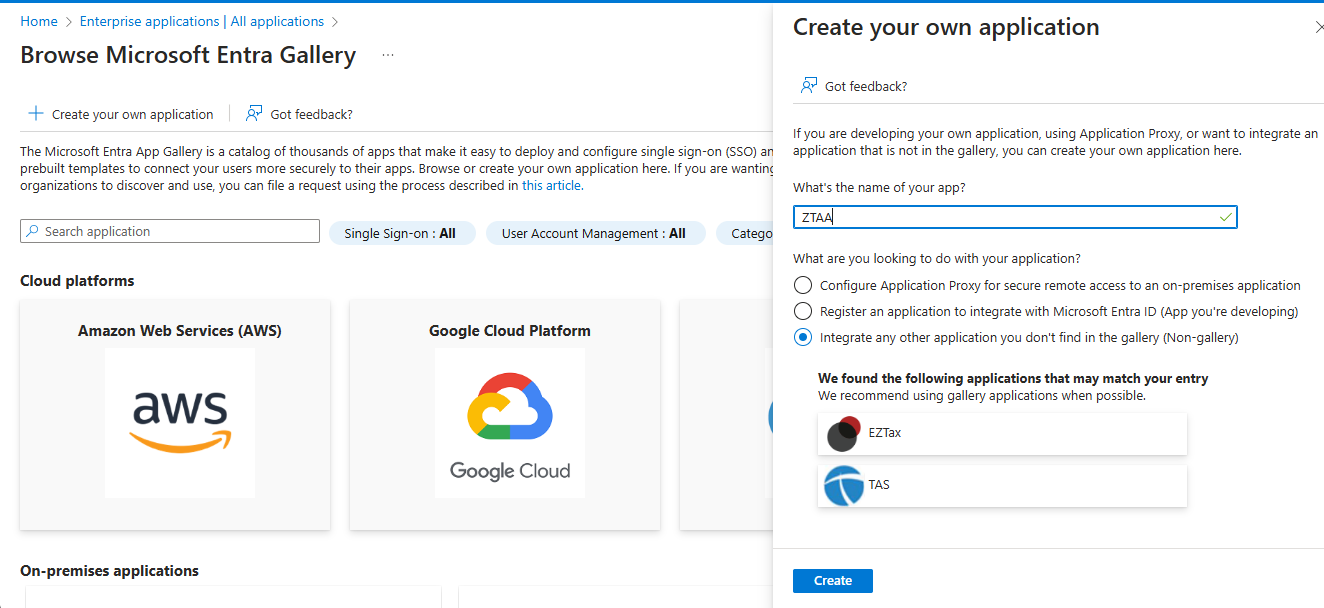
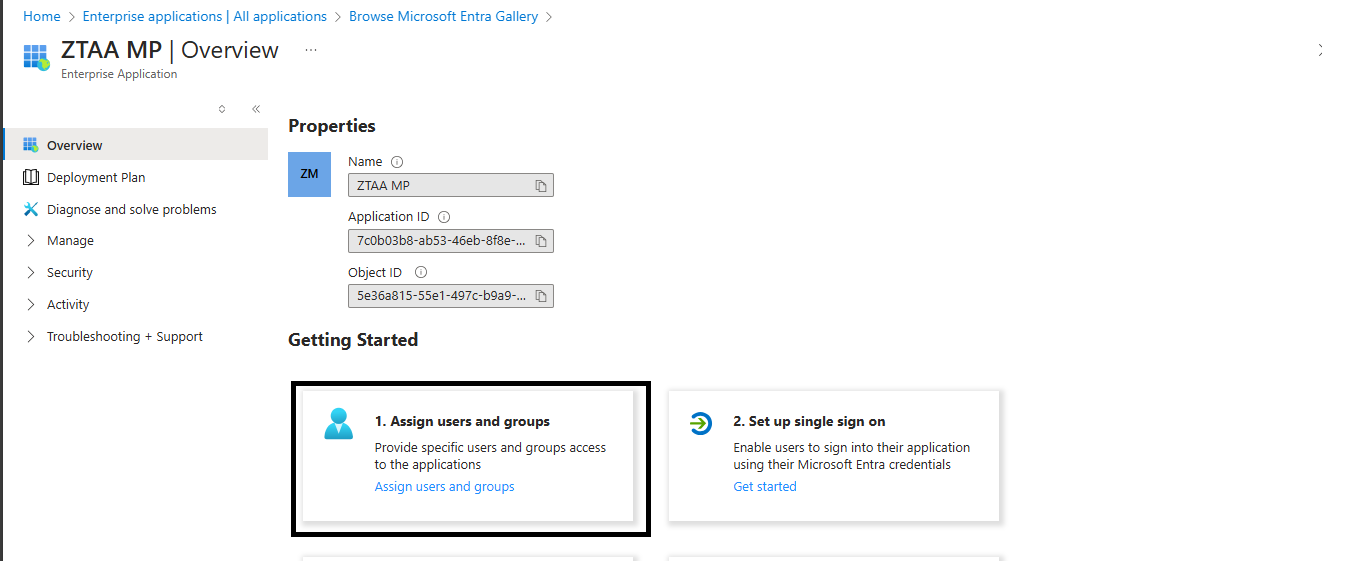
-
Under Manage > Properties, save the Access URL
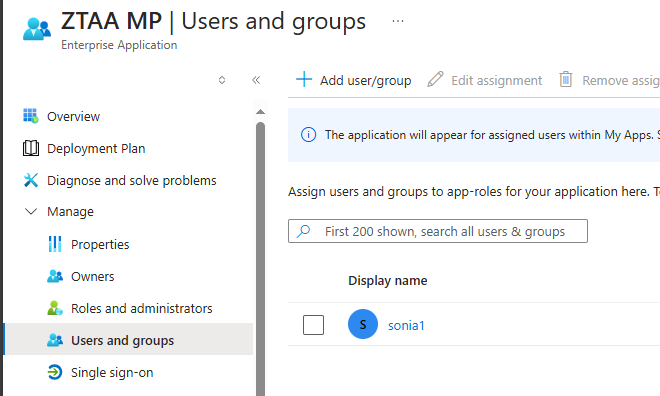
-
Go to Users and Groups and assign users or groups
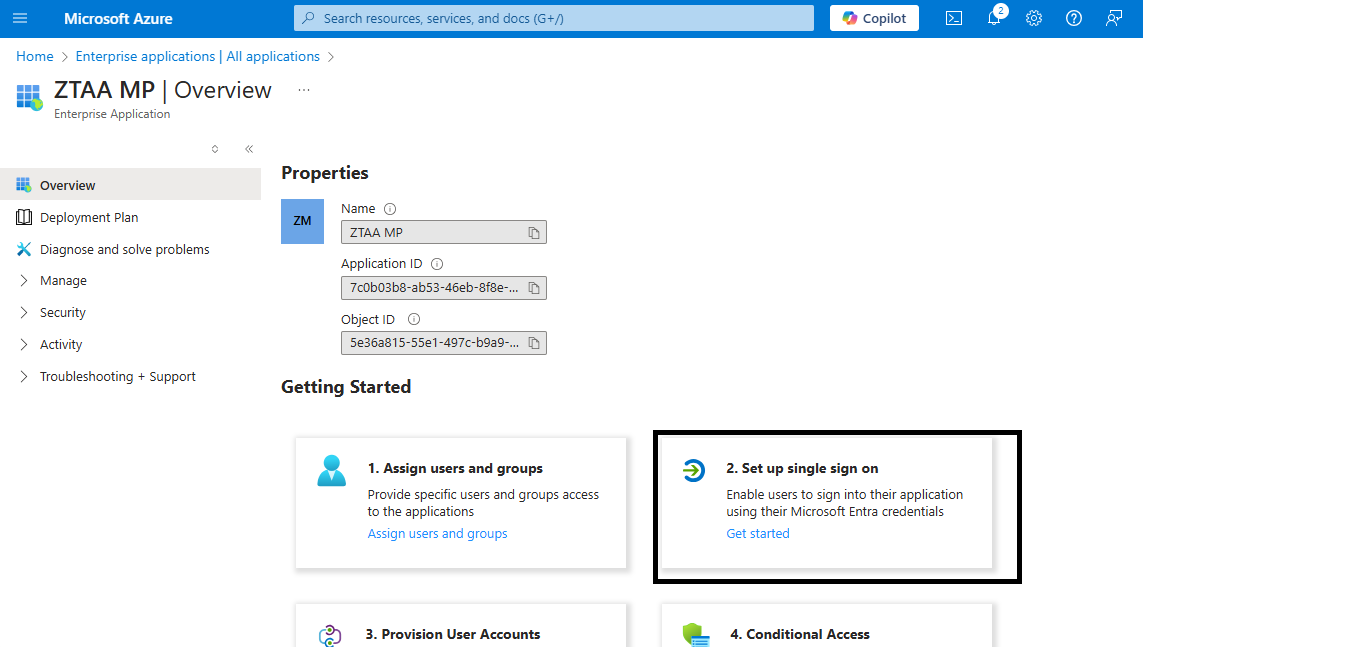
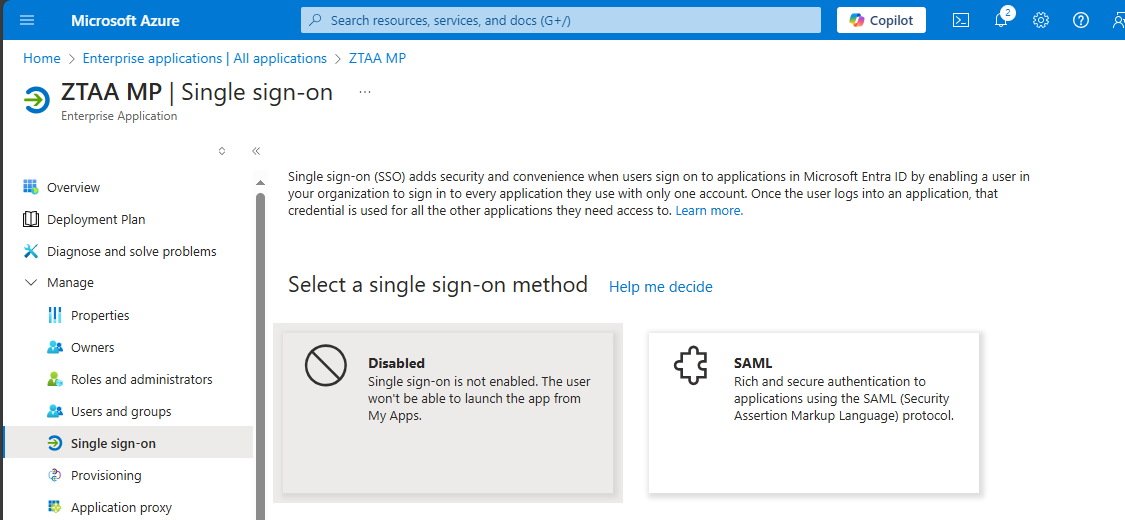
-
Go to Single sign-on > SAML
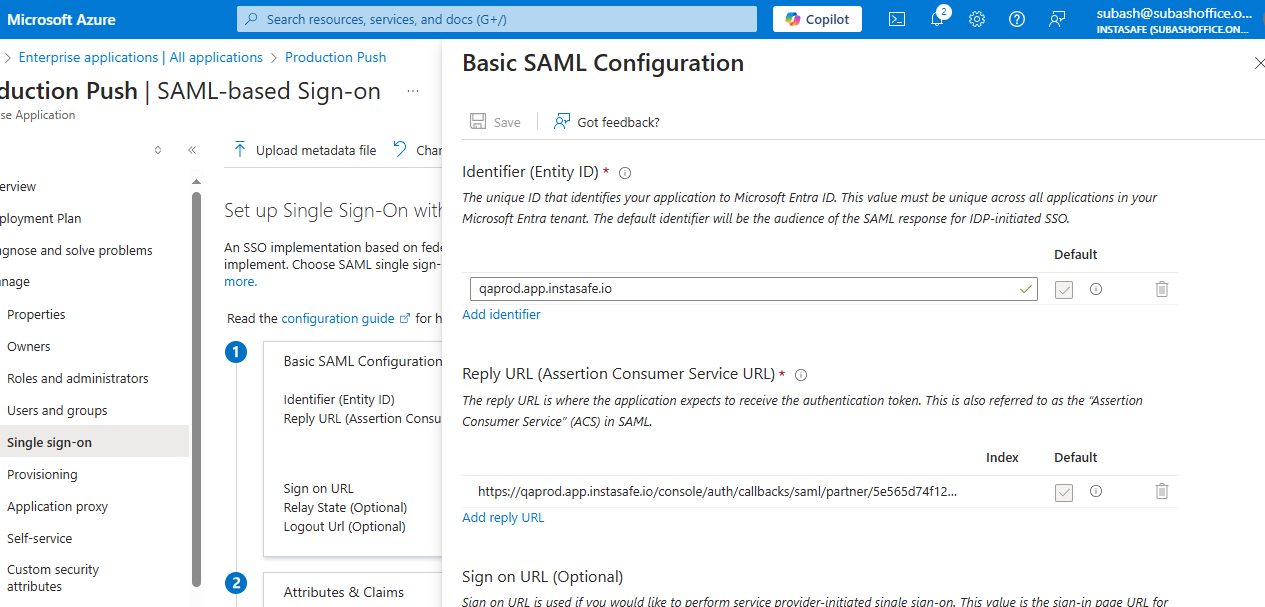
Basic SAML Configuration
| Field | Value / Source |
|---|---|
| Entity ID | Enter a unique string (e.g., https://ztaainstasafe/entity) |
| ACS (Reply) URL | Copy this from ZTAA console |
| Sign-on URL | ZTAA login page URL (optional for IDP-initiated login) |
-
User Attributes & Claims
- Ensure the value for NameID or email claim is set to:
user.mail
- Ensure the value for NameID or email claim is set to:
-
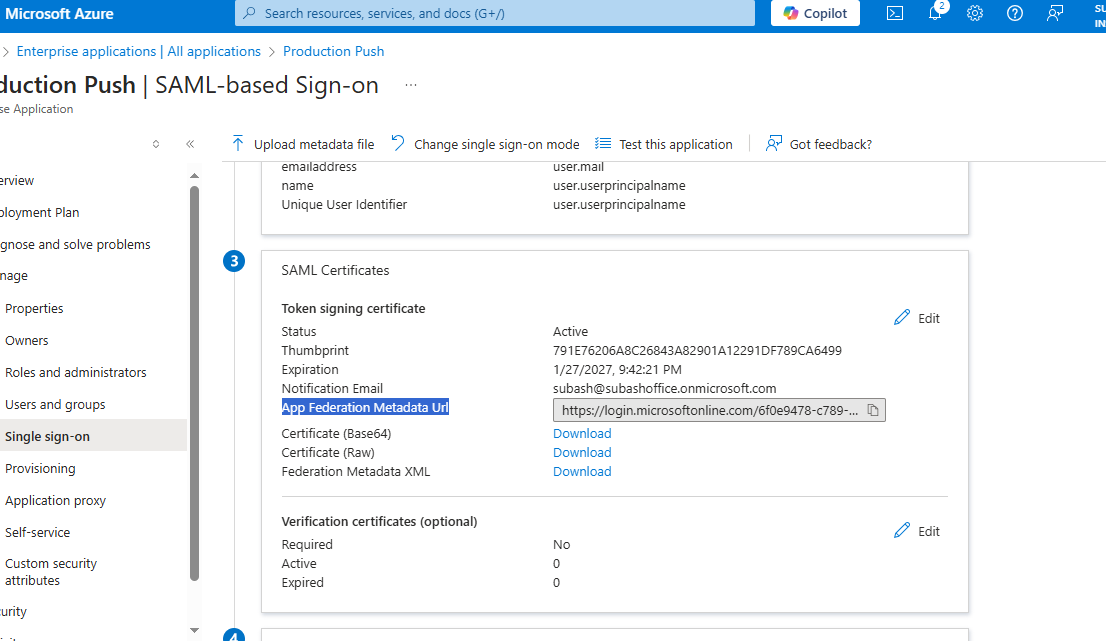
SAML Signing Certificate
- Download the Base64 certificate
- Copy the App Federation Metadata URL
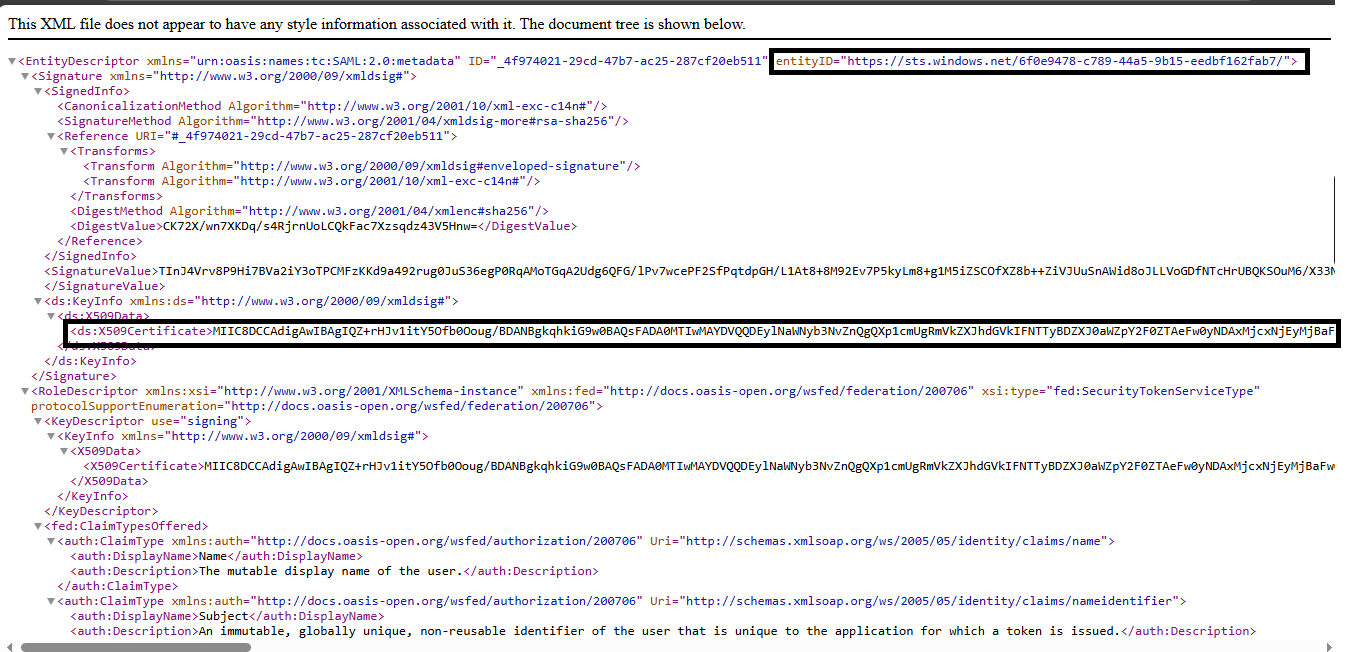
- Open the URL in browser and extract:
- IDP Entity ID
- SSO Login URL
- Certificate (X.509)

ZTAA Configuration
- Login to ZTAA Console as administrator
-
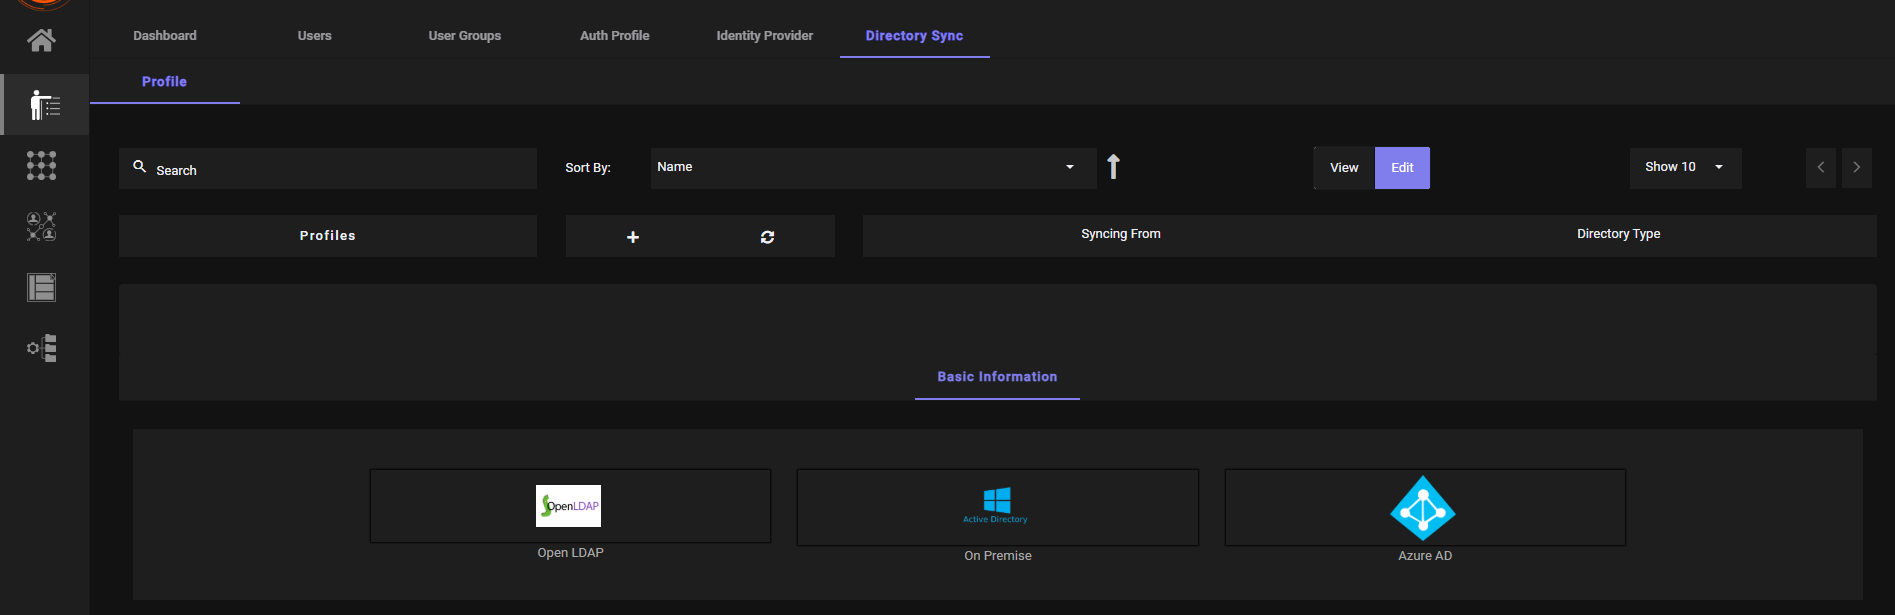
Navigate to Identity Management > Directory Sync Profile > Azure Profile
-
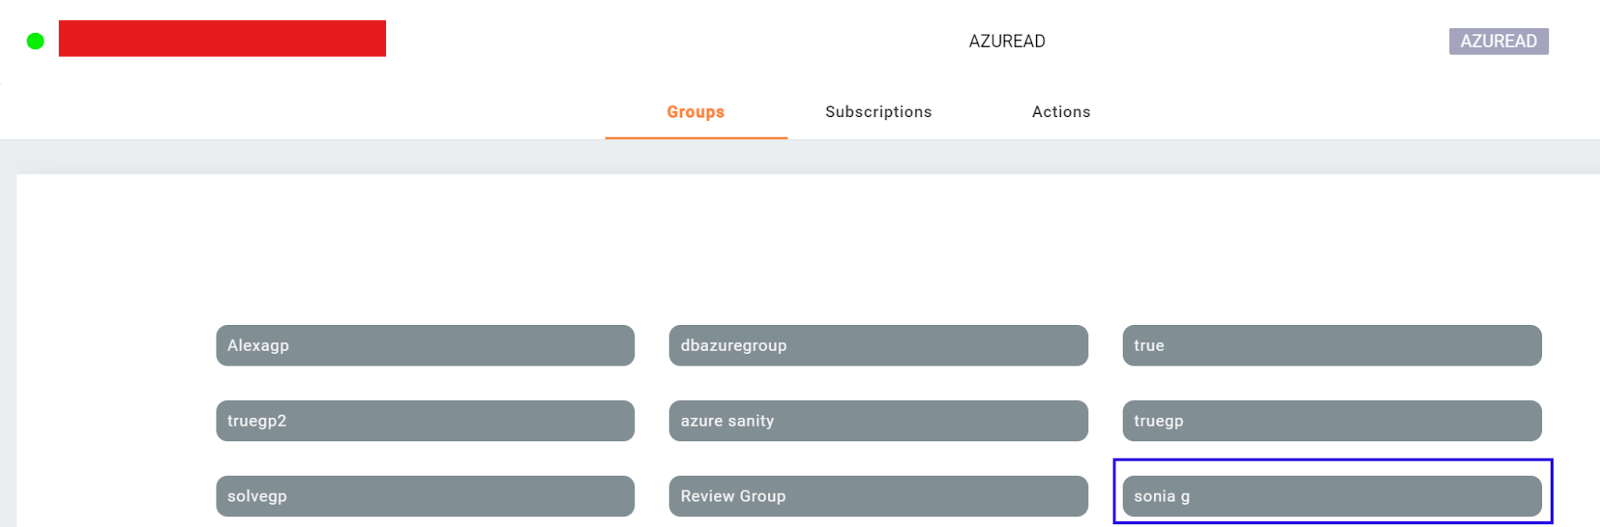
Add Azure Group to Profile and click Sync
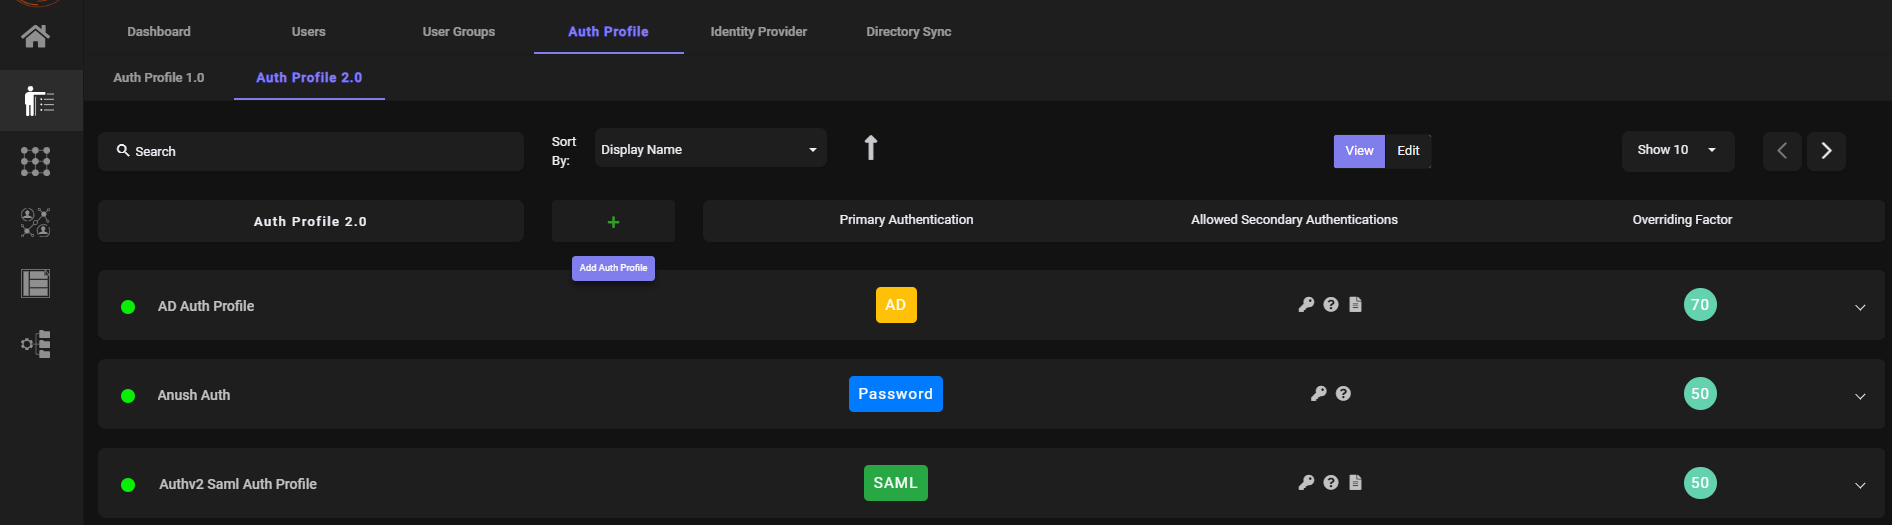
- Navigate to Auth Profile
-
Click Add New Profile
-
Select SAML as primary authentication. Fill the details.
- Paste the following details from Azure:
- IDP Entity ID
- SSO Login URL
- Certificate (downloaded earlier)
- Set Requested Authentication Context Comparison to
Exact - Match Entity ID
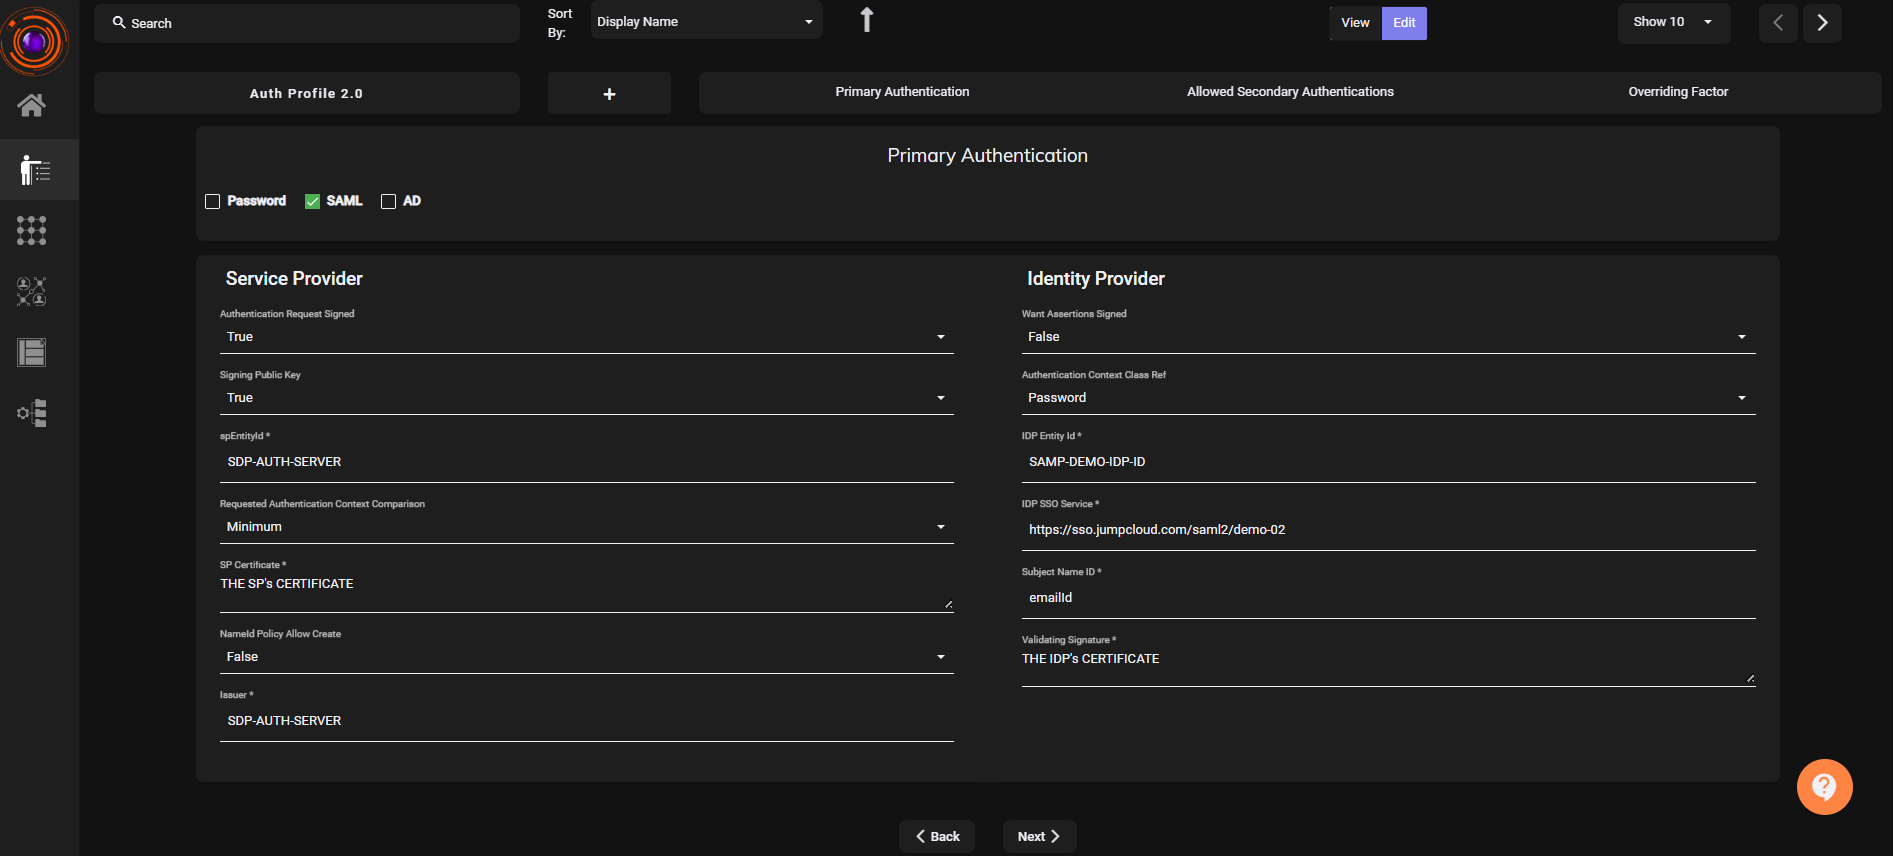
- Paste the following details from Azure:
-
Click Next. Save and complete the setup.
-
Go to User or User Group that were imported from Azure AD and add this Auth Profile to them.
Verification
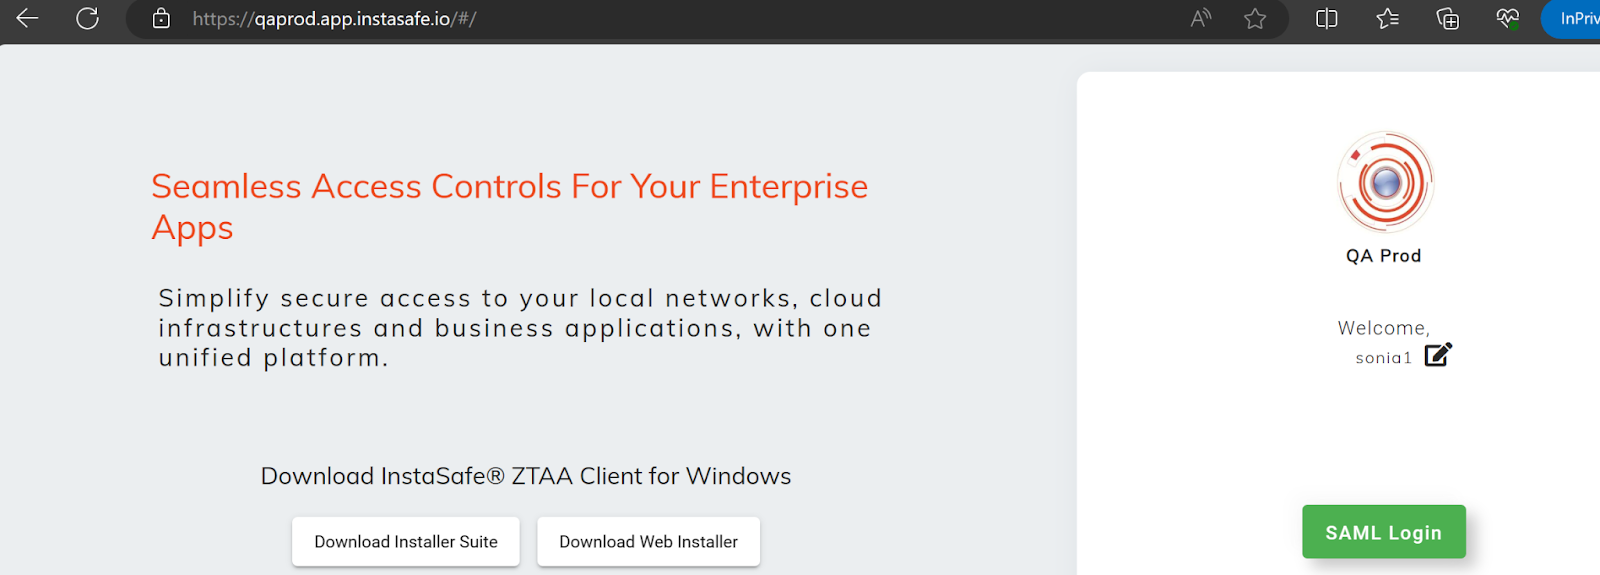
- Visit the ZTAA Login Page
- Enter the configured username (usually email)
-
Click on SAML Login
-
Redirects to Microsoft Login Page
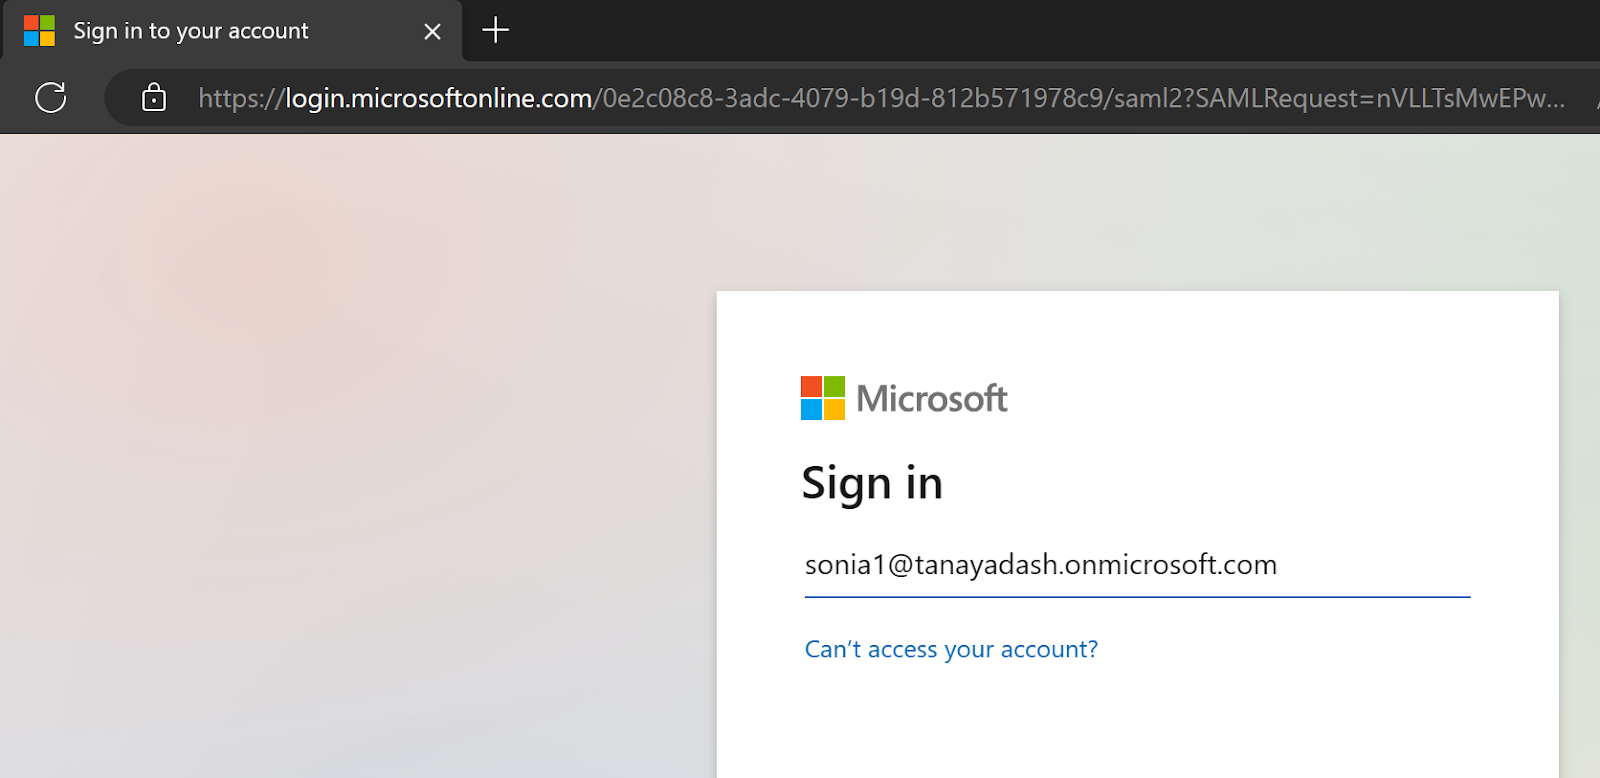
-
Enter Azure credentials
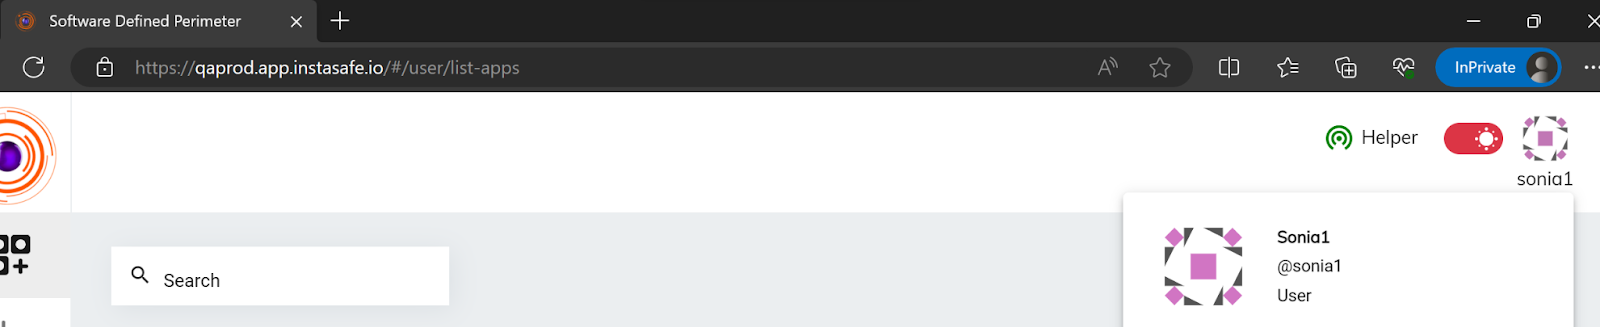
-
Upon successful login, redirected back to ZTAA and granted access
Note: It is recommended to keep the ZTAA username same as the email to avoid configuration issues.